Easy DIY 2×4 Chair Plans – Outdoor Dining Chair
Learn how to build an easy DIY 2×4 chair with simple joinery, easy-to-follow plans, a step-by-step tutorial, and a video. Perfect outdoor dining chair or patio chair.

***This project is sponsored by Mendocino Redwood. All opinions are my own. Thank you for supporting the brands that make it possible to bring you new projects***
I built a small dining table for my patio a few years ago. Since then, I have had multiple requests for an outdoor chair to go with it.
I had always planned on building matching chairs but never got around to it. Finally, I have a chair that not only looks good but is pretty straightforward to build.
Here is the simple DIY chair:

- It uses all 2×4 boards
- Uses simple joinery (dowels and pocket holes)
- Can be built in a couple of days
Let’s get right into it!
What Type of Wood to Use for the Chair
Outdoor furniture almost always sees a fair share of moisture. Hence, you want to make sure that the wood is weatherproof.
I picked redwood because it is not just naturally weather-resistant, but also super lightweight – which is something you need in a chair.
Plus, it matches the dining table I built 4 years ago!

Mendocino Redwood is grown and harvested in accordance with some of the highest environmental standards in the world. From conserving energy to absorbing greenhouse gases, no other building material offers the environmental advantages that come naturally with redwood.
If you do not have redwood available, cedar is a great choice as well.
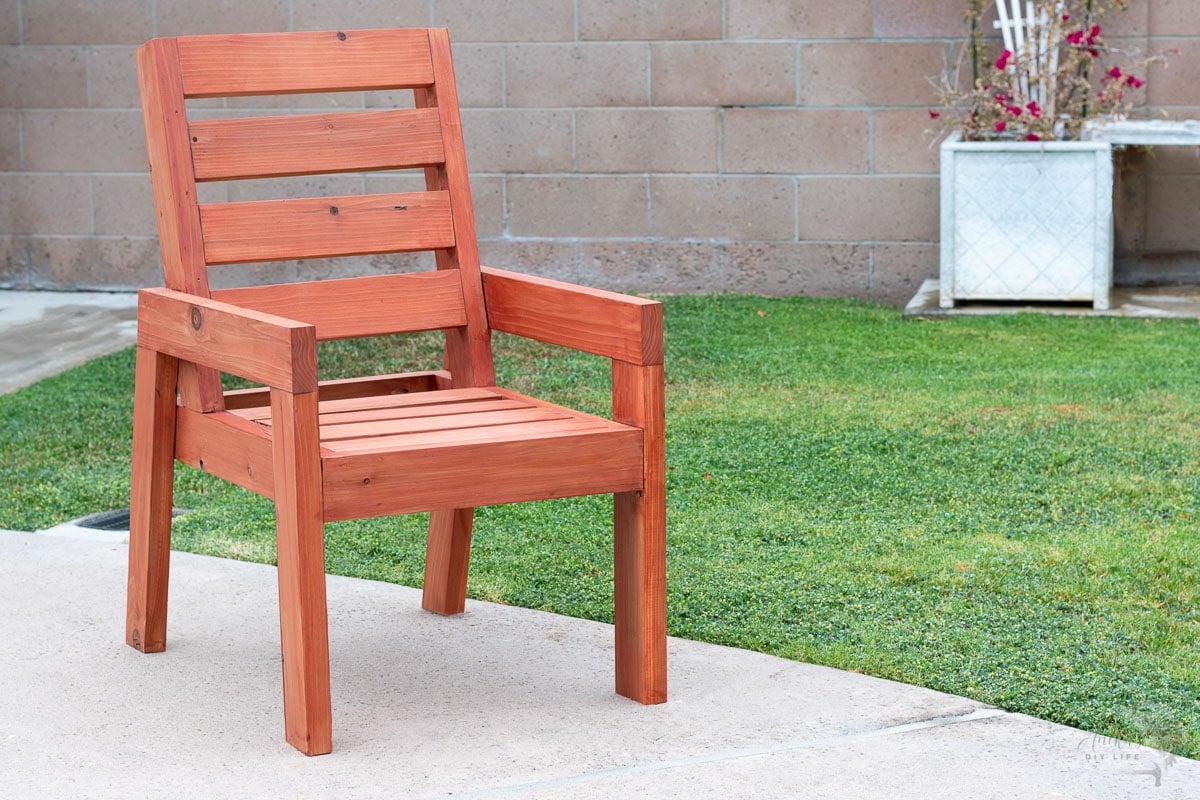
The 2×4 Chair Design
To design this chair, I used the existing metal and plastic chairs as an inspiration and used the overall design and dimensions from there.
- The backrest is at a slight angle to add comfort.
- The back leg is angled as well to add stability to the chair.
- The chair is higher than typical patio chairs and can be used as a dining chair.
- The chair can be used as a patio chair as well.
- The armrests are at a very comfortable height.
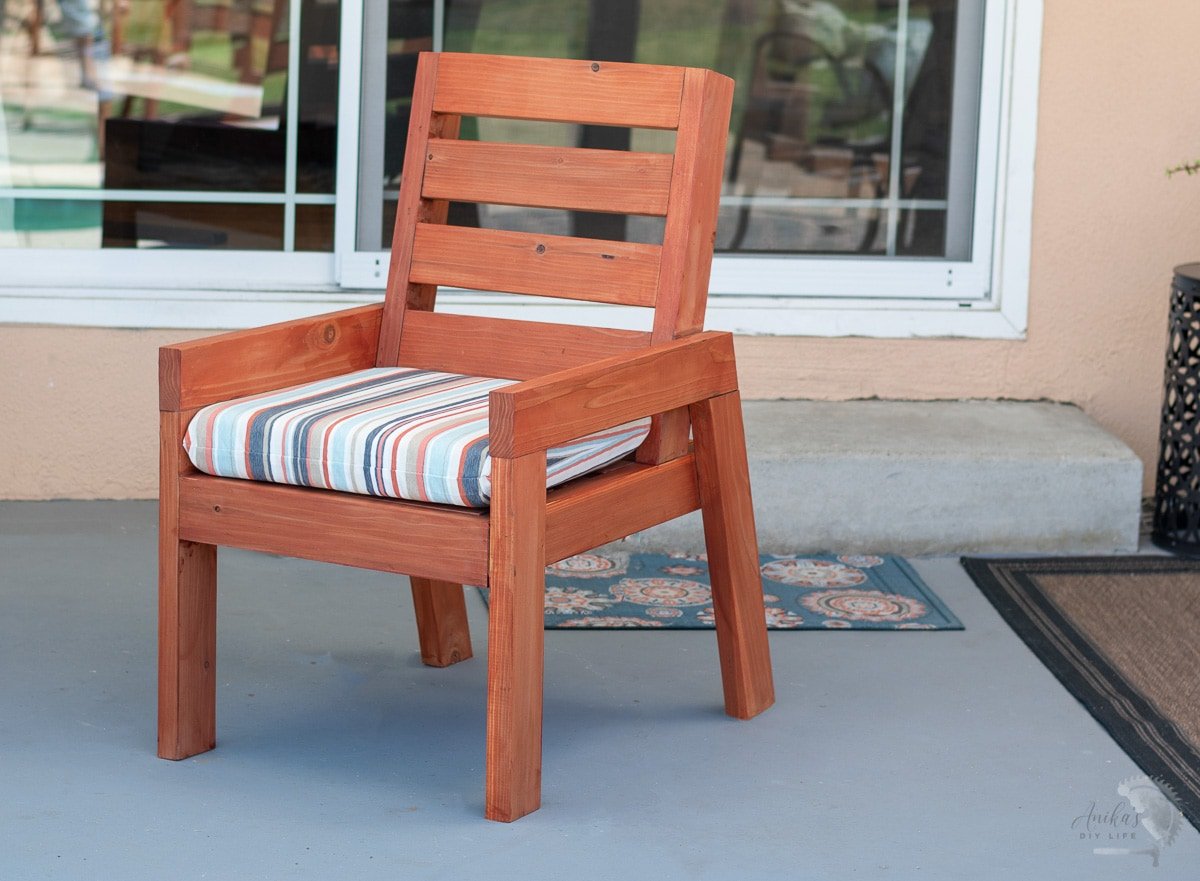
- The seat size is such that you can use a standard 17″ chair cushion if you like.
DIY 2×4 Chair Joinery
This chair uses a few different joinery techniques:
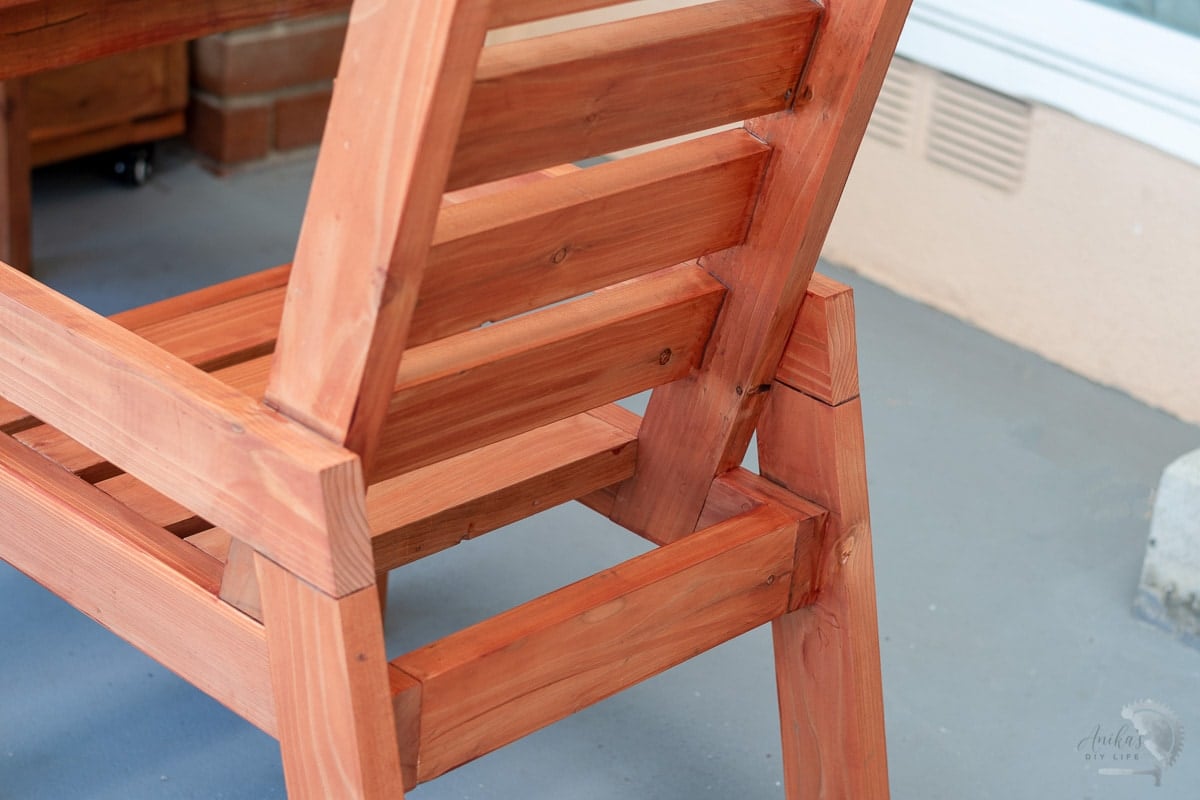
- Dowel Joinery – for concealed joints
- Half Laps – for stable and concealed angled joints
- Pocket holes – strong joints that won’t be visible.
Don’t let this list intimidate you!
I promise each of these joineries is super easy, use simple tools, and my video tutorial, as well as the written tutorial below, will guide you through it step-by-step.
This project can be made with ALL dowels or ALL pocket holes in which case, the pocket holes will be in visible locations and may need more work to camouflage.
***This post contains referral or affiliate links. It is a way for this site to earn advertising fees by advertising or linking to certain products and/or services. Please read my full disclosure here ***
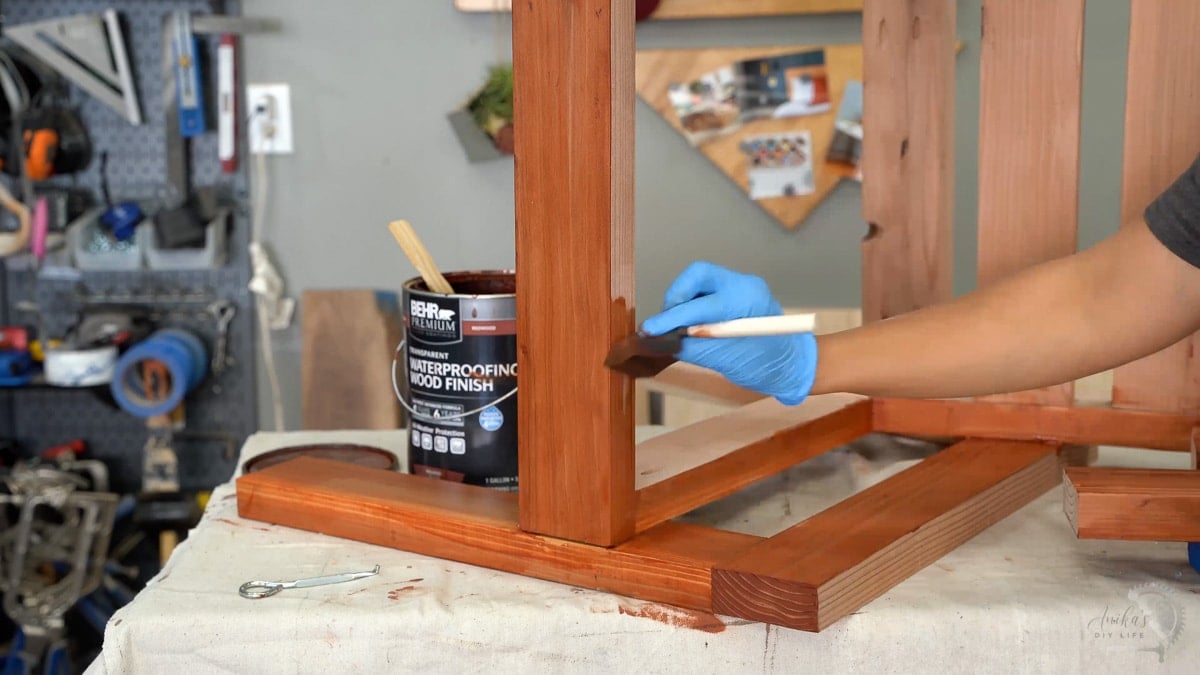
How to Finish the Outdoor Chair
To finish the outdoor chair, you can use a stain of your choice followed by polyurethane.
I like using waterproofing deck stain in the color redwood. It brings out the beauty of the redwood as well as protects it from the elements.
The dining table is still looking great 4 years later under the covered patio. The hammock stand and towel holder needed to be re-stained about 3 years later.
Material Needed
- Lumber per the plans. I got Mendocino Redwood from The Home Depot.
- 1/2″ dowels
- 2 ½″ outdoor pocket screws
- Kreg Quick Flip or a countersinking drill bit.
- 3/8″ Plug Cutter bit
- Exterior wood glue
- tape measure
- speed square
- Sanding sheets in various grits. These are my new favorites.
- Weatherproofing stain. I used a weatherproofing transparent stain in the color “redwood.”.
- ISOtunes Bluetooth Hearing Protection. Use code ANIKA10 for $10 off
Tools Needed
- Miter saw
- Planer (optional)
- Pocket hole Jig. I used the Kreg Jig 720 but any model will work. See which KregJig is right for you
- Drill/Driver
- Random orbital sander.
- Circular saw
- Drill Press (optional)
- Kreg Drilling Guide
- Flush cut trim saw
- Tape measure
Video Tutorial
I have a full step-by-step video showing you exactly how to build this chair using 2×4 boards. See below. The full written tutorial follows as well.
Step-By-Step Tutorial
Step 1: Prepare the Boards
- Make the cuts per the cut list in the plan. (Link after the tutorial)
TIP: For the angled cuts, I like to set my miter saw at the angle and make all the cuts at once to get a consistent angle.

- Sand the boards smooth starting with 80- grit to 220 grit sandpaper.
I sent them through the planer to get the top surfaces smooth but this is totally optional. You can also simply sand them down.
- Make pocket holes with a 1 1/2″ setting as shown in the plans.
I used pocket holes on only the bottom slats and to attach the front and back aprons since they will be hidden.
Step 2: Attach Back Supports
The back supports are attached to the armrests using half-lap cuts.
The half-lap cuts are made at an angle. I decided to use a circular saw and clamp the boards together to make the half lap cut in one go.

The two most important factors for getting well-fitting half-lap cuts are:
- Setting the blade depth perfectly
- Staying inside the lines for the cuts. It is always easy to trim out extra if needed.
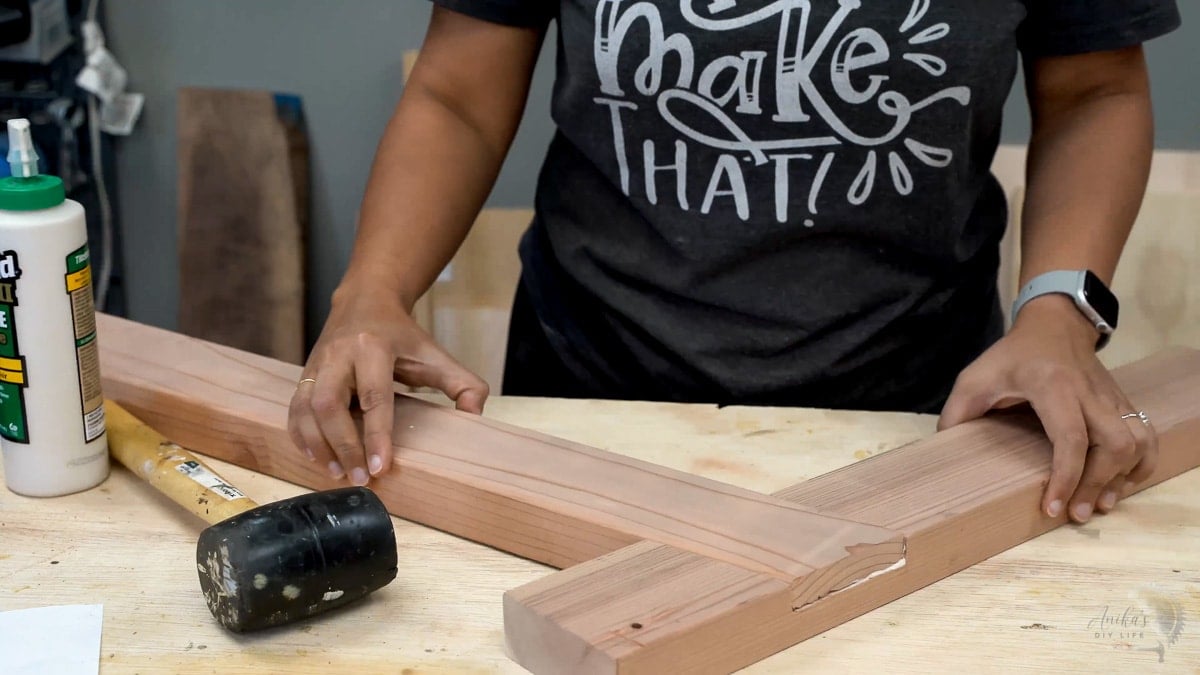
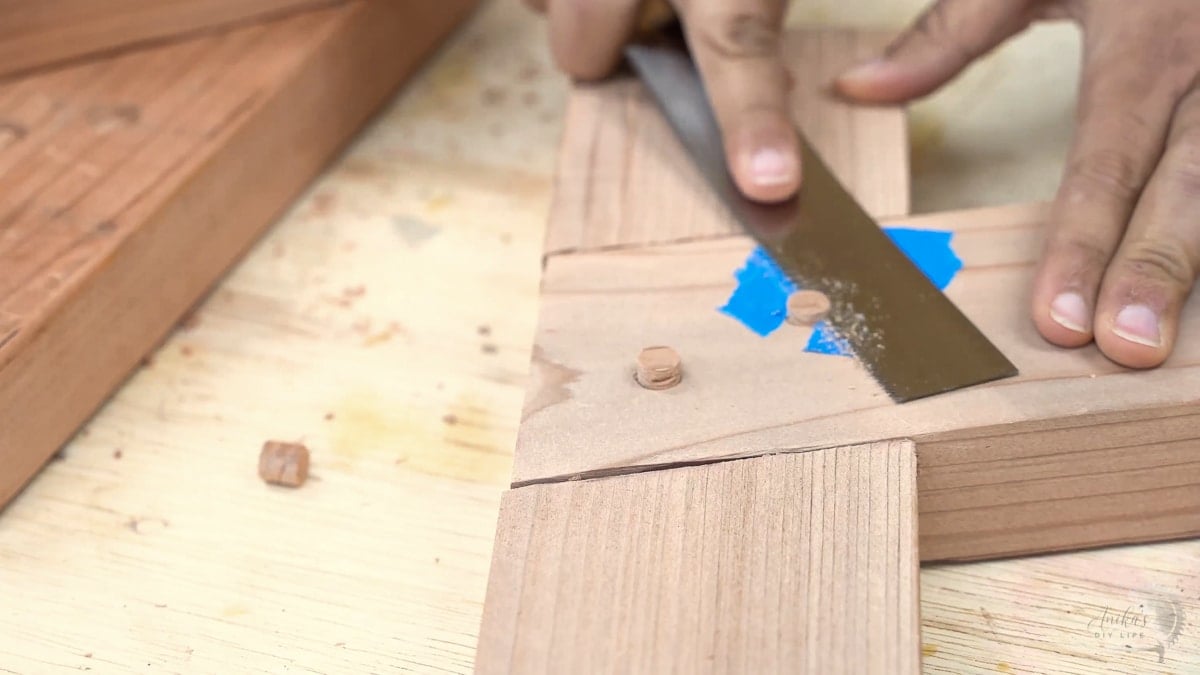
- Assemble the half-lap cuts with wood glue
- Add a couple of countersunk screws.
- Plug them with a dowel or homemade plug (optional). I used a plug cutting bit to make plugs using scrap redwood boards for a seamless look.
- Make two of these for each side.
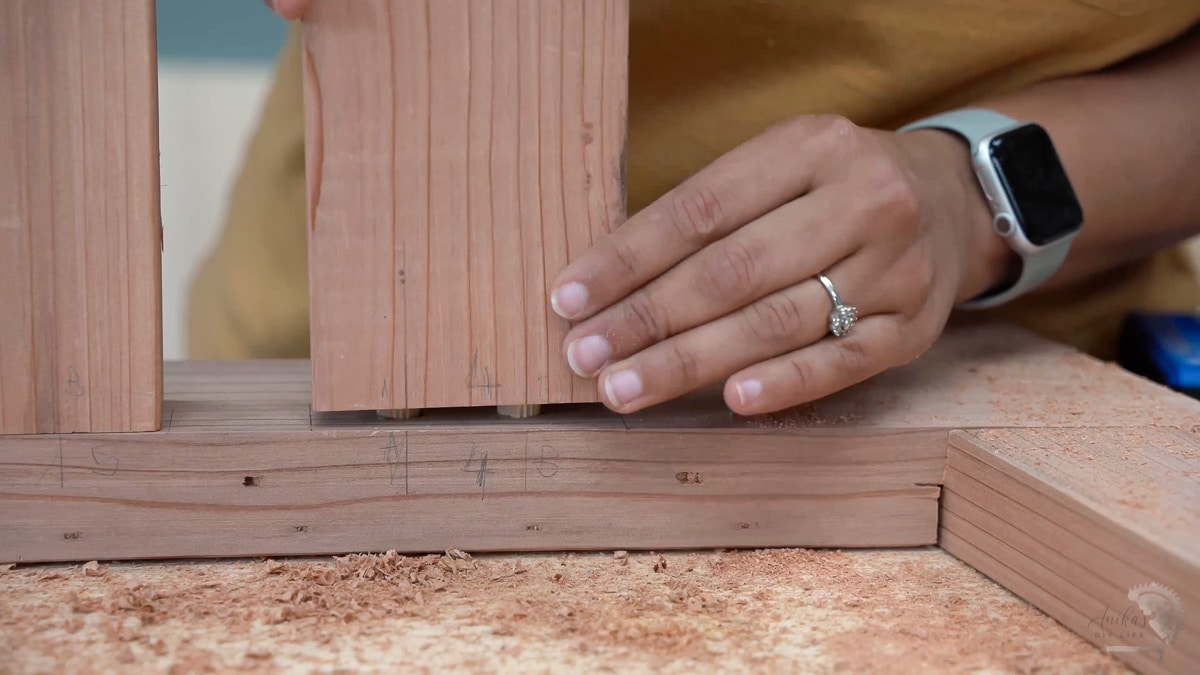
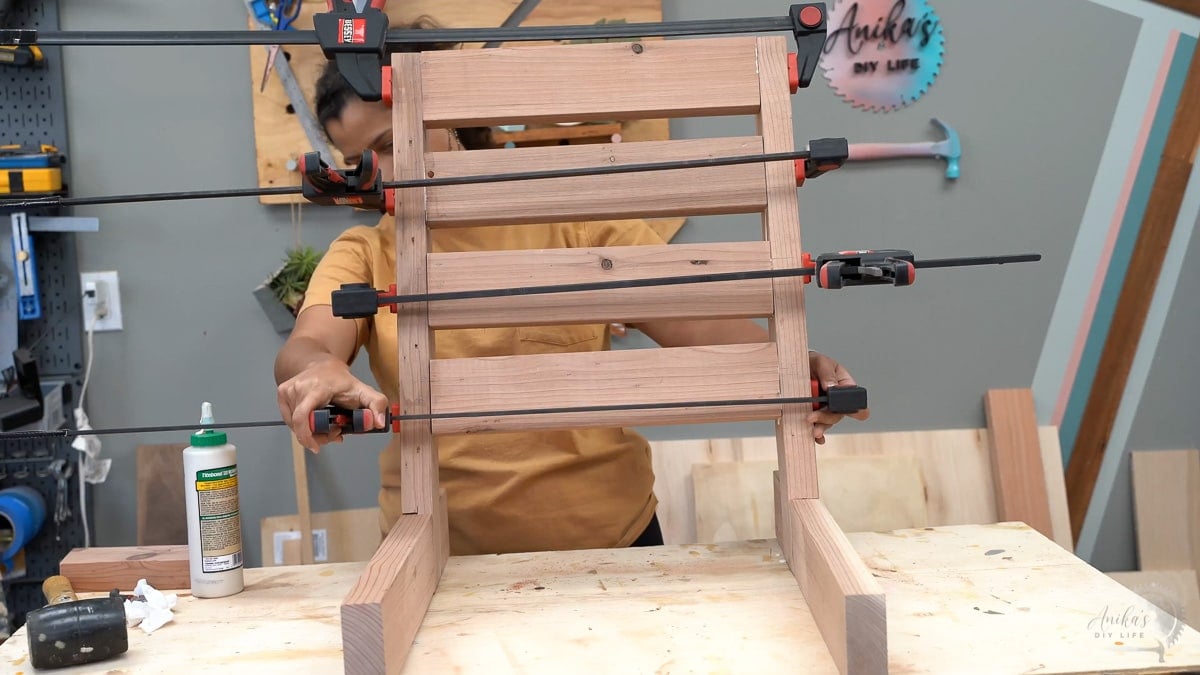
Step 3: Add Back Slats
The back slats are added between the two backrests made in step 2.
To attach the back slats, there are various choices :
- use pocket hole screws on the back. even though this is very easy, the pocket holes will be visible on the back.
- Use countersunk screws from the sides. The holes can be filled with plugs. However, they would still be visible. They definitely add character and work well if that is the look you are going for.
- Use dowel joinery – completely concealed and easy to put together.
To attach the back slats, I decided to use dowel joinery.
You can use a dowel jig but I found that the Kreg Drill guide was easy to use and worked really well for this.
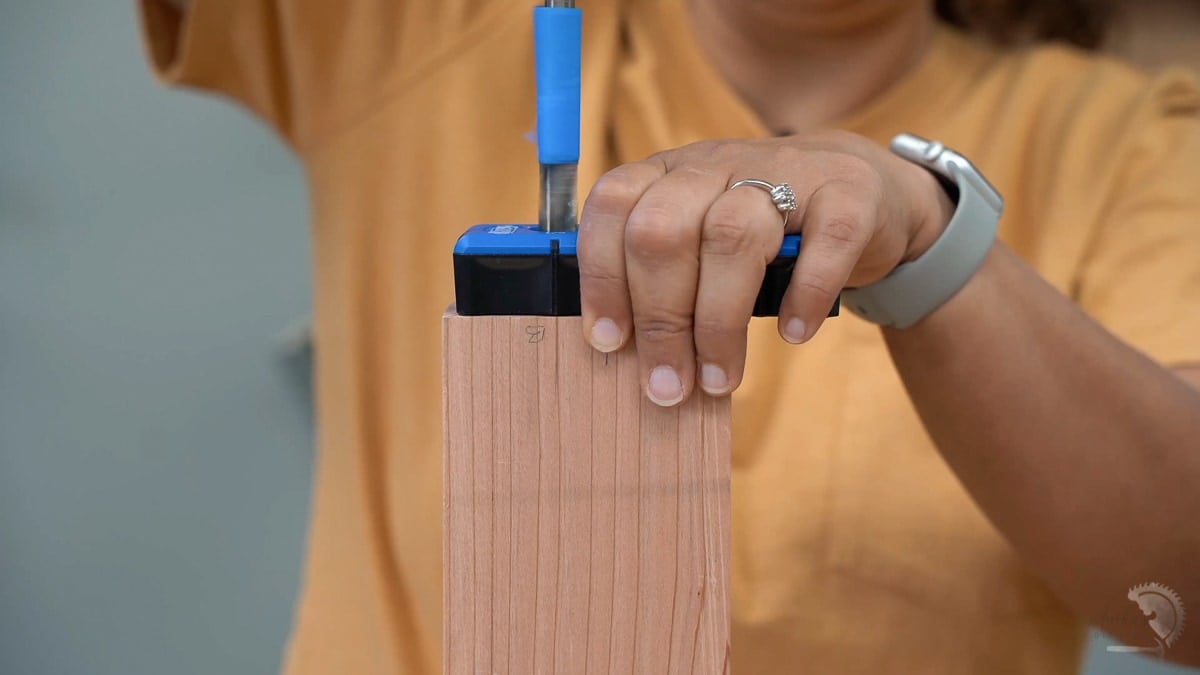
- Make dowel holes on both ends of the slats and attach using 1/2″ dowels and wood glue.
- Clamp and allow to dry overnight
Step 4: Build the Sides
The sides include the front legs, the armrest, and the angled back legs.
- Build the armrest using dowel joinery.
- Clamp and allow to dry overnight.
Tip: In order to clamp the angled pieces and to have the clamp exert even pressure, you can use a few of the angled cut-offs on the ends.

- Make two of these for each side.
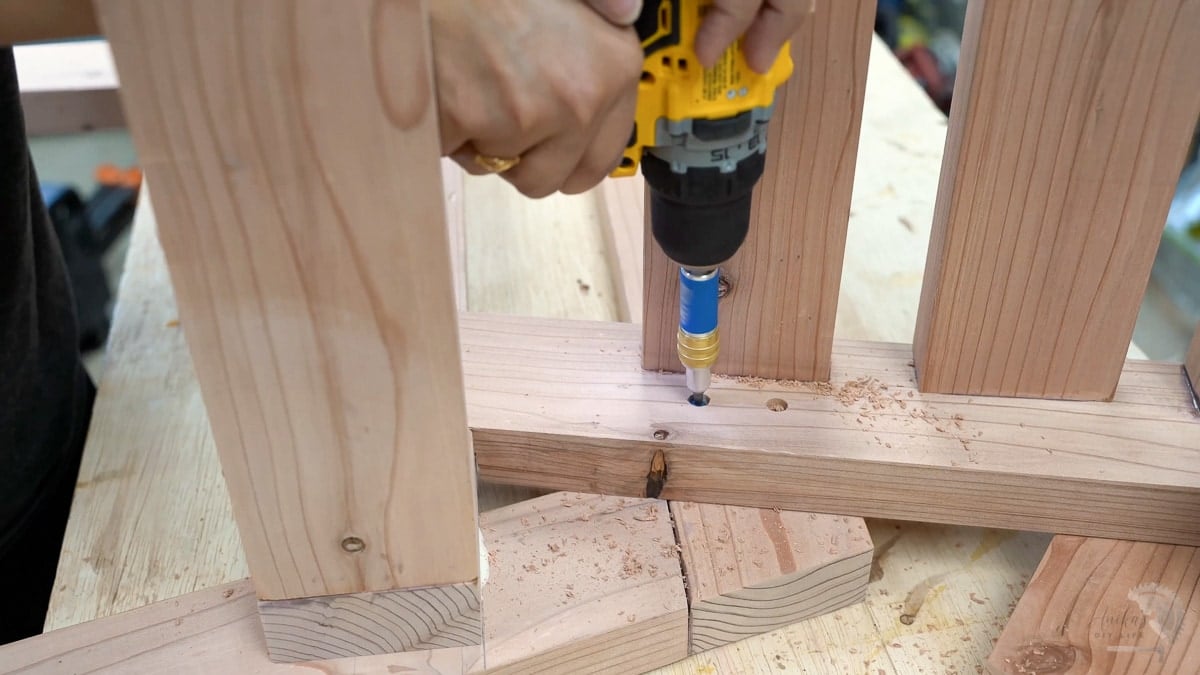
Step 5: Attach Aprons and Sides
- Attach the front apron and back aprons on the chair seat using 2 1/2″ exterior pocket hole screws and wood glue.

- Attach the sides to the seat frame using wood glue countersunk wood screws from the sides.
- There are multiple places you can add the screws at the front and the back.
- Keep the holes symmetric on both sides.
- Be sure to drill pilot holes first.
- Add plugs to hide the holes and for a seamless look.
Step 7: Stain/Finish
- You can go over the edges of the chair with a round-over bit in a router or just use a sander.
- Clean up any extra glue residue
- This is a good time to apply stain in the color of your choice.
Step 8: Add Seat Slats

- Attach the slats to the bottom of the seat using 2 1/2″ exterior pocket hole screws and wood glue.
Step 9: Apply the Final Finish
The chair is done. You can apply a final coat of polyurethane to protect the chair from the elements and/or food spills if you like.
It is a simple chair and can be used in the backyard as a dining chair or a patio or a porch chair.
The chair can also be used with 17″ seat cushions if you want to make it extra comfy.
The great thing about building with redwood is that it not only looks gorgeous, but it is also pretty lightweight and can be easily moved around which is what you need in a chair.

As always, I have the plans available for you below.
Printable Plans for the 2×4 Chair
As always, I have printable plans with detailed drawings and step-by-step instructions available for you. Click the button below to have them sent directly to your email.
If you build it, I would love to see it! Feel free to email photos to me at anika@anikasdiylife.com or tag me on Instagram @anikasdiylife for a chance to be featured on social media! I can’t wait to see what you build!
You might also like:
 Learn how to build an easy DIY 2x4 chair with simple joinery, easy-to-follow plans, a step-by-step tutorial, and a video. Perfect outdoor dining chair or patio chair." width="720" height="720" />
DIY Outdoor Dining Chair
Yield: 1 outdoor dining chair
How to build a DIY 2x4 chair for the outdoors with simple joinery.
Materials
- Lumber per the plans. I got Mendocino Redwood from The Home Depot.
- 1/2" dowels
- 2 ½″ outdoor pocket screws
- Kreg Quick Flip
- 3/8" Plug Cutter bit
- Exterior wood glue
- tape measure
- speed square
- Sanding sheets in various grits.
- Weatherproofing stain
- ISOtunes Bluetooth Hearing Protection. Use code ANIKA10 for $10 off
Tools
- Miter saw
- Planer (optional)
- Pocket hole Jig.
- Drill/Driver
- Random orbital sander.
- Circular saw
- Drill Press (optional)
- Kreg Drilling Guide
- Flush trim blade
- Tape measure
Instructions
- Make the per the cut list in the plan and sand them smooth. Make pocket holes with a 1 1/2" setting as shown in the plans.
- Attach back supports using half-lap cuts. Assemble half-lap cuts with wood glue and countersunk screws. Plug them with a dowel or homemade plug (optional)
- Add back slats between the two backrests made in step 2. I used dowel joinery, but you could also use pocket hole screws or countersunk screws.
- Build the sides that include the front legs, the armrest, and angled back legs.
- Attach the aprons using 2 1/2" exterior pocket hole screws and wood glue. Attach the sides using countersunk screws. Add plugs to hide the holes and for a seamless look.
- Stain in the color of your choice.
- Add seat slats using 2 1/2" exterior pocket hole screws and wood glue.
- Apply a final coat of polyurethane to protect the chair from and elements and you're done!
